Registering an Account and Scheduling an Appointment with the UCEW
In order to access our appointment scheduling system, please follow the steps below. Individuals with FAU credentials (students, staff, and faculty) can register an account with WCONLINE to reserve an appointment with the UCEW.
Review the following guide on how to register an account through the UCEW’s website and schedule an appointment through WCONLINE.
Accessing the registration portal
- Visit the UCEW website at u41x.touchmediahk.com/ucew
- Select “Schedule Appointment” on the homepage
- Review and scroll down to agree to the writing center terms
- Select “Continue to Scheduler”
- Log in with your FAUNET ID credentials
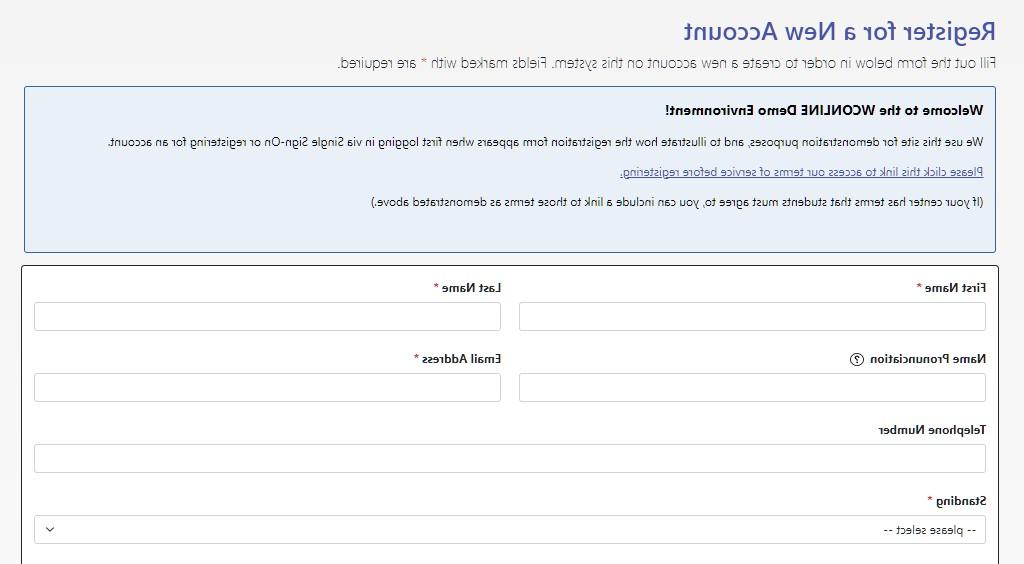
- Select “First Visit? Register for an account” through the WCONLINE portal


Registering an account
- Complete the registration form with your personal and academic information
- Provide your email and create password to access the WCONLINE scheduler
- Return to the homepage to log in with your WCONLINE credentials


Scheduling an appointment
- Select the campus schedule of your preference
- Identify the white box on the schedule to reserve an open appointment
- Include the appointment information on the pop-up window
- Select “Online” or “In Person” for your preferred appointment format
- Select “Save Changes” at the bottom of the window


Accessing your appointment
- Visit u41x.touchmediahk.com/ucew and click “Schedule an appointment” on the homepage
- Log in with your unique credentials and select your preferred campus schedule
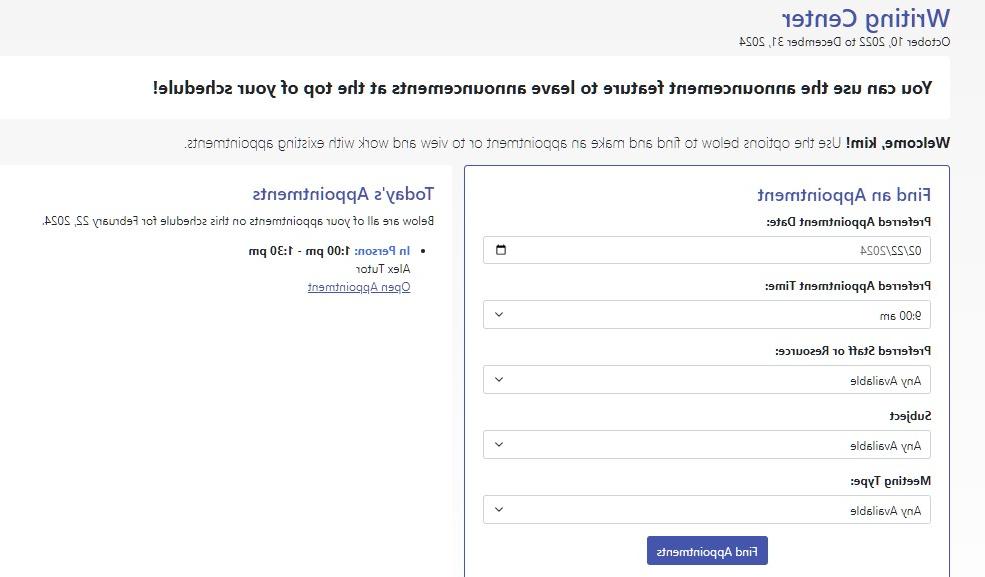
- On the top of the page, select “Appointment Search"
- Select the scheduled date and time of your appointment
- Review the existing appointment details on the pop up window
- To access the online appointment, scroll down on the existing appointment window and click “Start or Join Online Appointment”


Editing your appointment details
- On the task bar at the top, scroll down to select “My Appointments”
- On the appointment pop-up window, click “Edit Appointment” or “Attach File” to submit additional details or materials to your appointment profile
- Select “Save Changes” to confirm the changes


Canceling your appointment
- On the existing appointment window, scroll down to select “Cancel Appointment”
- Select “Yes” or “No” to send a confirmation email of your cancelation
- Select “Confirm Cancelation”

Rescheduling your appointment
- Once you have canceled your previous appointment, select another white box on the time and date of your new appointment
- Complete the appointment details on the pop up window
- Select “Save Changes” to confirm your new appointment


For any questions, please contact us at ucew@touchmediahk.com or 561-297-3498.